Mastering IV Insertion: Tips from the Pros
A comprehensive text on mastering IV insertion that draws from professional nursing expertise. Covers from foundational anatomy to advanced troubleshooting techniques.
9/9/20253 min read

Intravenous (IV) insertion is one of the most fundamental yet challenging skills in nursing practice. Whether you're a new graduate or a seasoned professional looking to refine your technique, mastering this essential skill can significantly impact patient comfort and clinical outcomes. After decades of practice and teaching, experienced nurses have developed proven strategies that can help you achieve first-stick success more consistently.
The Foundation: Understanding Venous Anatomy
Before diving into technique, it's crucial to understand what you're working with. Veins are dynamic structures that respond to temperature, hydration status, patient positioning, and stress levels. The most commonly used peripheral veins include:
Upper extremity options:
Cephalic vein (lateral forearm and hand)
Basilic vein (medial forearm)
Median cubital vein (antecubital fossa)
Dorsal hand veins
Key anatomical considerations:
Veins run alongside arteries but are more superficial
Valves within veins can create resistance during insertion
Vein depth varies significantly between patients
Fragile veins in elderly patients require modified techniques
Pre-Insertion Assessment: The Professional's Advantage
Experienced nurses know that successful IV insertion begins long before touching the patient. A systematic assessment approach dramatically improves success rates:
Patient History Review
Previous IV experiences and difficulties
Current medications (especially blood thinners)
Medical conditions affecting circulation
Allergies to tape, antiseptics, or materials
Hydration status
Physical Assessment
Skin integrity and temperature
Presence of edema or lymphedema
Previous surgical sites or medical devices
Patient anxiety level and cooperation ability
Vein Selection Criteria
Look for veins that are:
Straight and relatively long
Well-supported by surrounding tissue
Away from joints when possible
Appropriate size for intended therapy
Avoid veins that are:
Hard, cordlike, or sclerosed
Located over joints or bony prominences
In areas of infection or compromised skin
On the affected side post-mastectomy
Equipment Mastery: Choosing the Right Tools
Professional success often comes down to equipment selection and preparation. Here's what the pros recommend:
Catheter Selection
24-gauge: Pediatrics, elderly patients, small veins
22-gauge: Standard adult use, blood draws
20-gauge: Most adult applications, moderate flow rates
18-gauge: Trauma, surgery, rapid fluid administration
16-gauge or larger: Emergency situations, blood transfusions
Essential Supplies Checklist
Appropriate catheter size and type
Quality tourniquet (latex-free when indicated)
Antiseptic preparation (chlorhexidine preferred)
Transparent dressing
Saline flush
Extension set if indicated
Gauze and tape backup
Gloves and protective equipment
The Professional Technique: Step-by-Step Excellence
Preparation Phase
Position optimization: Ensure patient comfort and your ergonomic advantage
Lighting assessment: Adequate lighting is non-negotiable
Tourniquet placement: 4-6 inches above insertion site, tight enough to impede venous return but maintain arterial flow
Skin preparation: Allow antiseptic to fully dry for maximum effectiveness
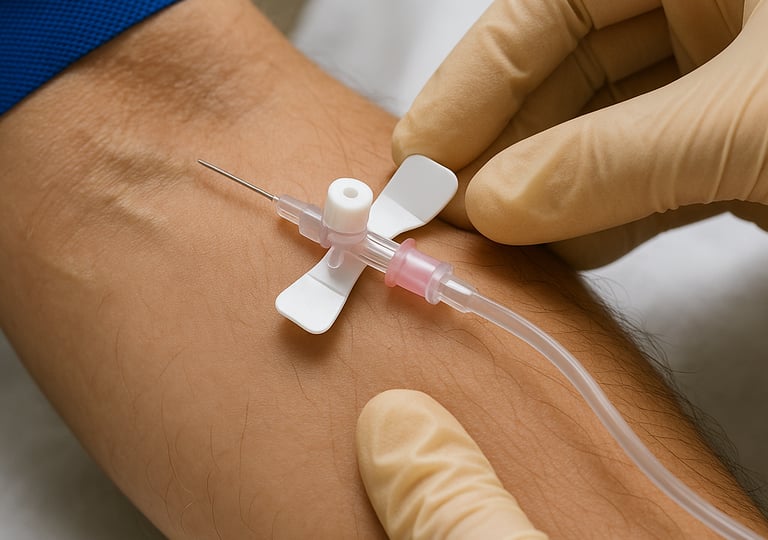
Insertion Technique
Stabilization: Use non-dominant hand to anchor skin and vein
Entry angle: 15-30 degrees, bevel up
Insertion approach: Smooth, controlled advancement
Flash recognition: Watch for blood return in catheter hub
Threading: Lower angle and advance catheter while withdrawing needle
Immediate securing: Release tourniquet and secure catheter before connecting tubing
Post-Insertion Protocol
Immediate flush to confirm patency
Secure with transparent dressing
Label with date, time, and initials
Document insertion details
Assess site and patient response
Pro Tips for Challenging Situations
For Difficult-to-See Veins
Use a warm compress for 10-15 minutes before insertion
Lower the extremity below heart level
Gentle tapping can sometimes make veins more prominent
Consider using a vein finder device if available
For Fragile or Rolling Veins
Use minimal tourniquet pressure
Consider butterfly needles for very fragile veins
Approach at a shallower angle
Use your non-dominant hand to stabilize tissue on both sides of the vein
For Anxious Patients
Explain each step before performing
Use distraction techniques
Consider topical anesthetic for needle-phobic patients
Position patient comfortably to prevent vasovagal responses
For Dehydrated Patients
Encourage fluid intake if not contraindicated
Use gravity to your advantage
Consider ultrasound guidance for severely dehydrated patients
Warm compresses can help with vasodilation
Troubleshooting Common Problems
Blood return but won't flush:
Catheter may be against vein wall - try repositioning
Check for kinks in tubing
Verify tourniquet is released
Infiltration during insertion:
Stop immediately and remove catheter
Apply pressure to prevent hematoma formation
Try opposite extremity or different site
Multiple failed attempts:
Step back and reassess
Consider asking a colleague for assistance
Document attempts and consider alternative access if appropriate
Maintaining Professional Standards
Documentation Requirements
Date and time of insertion
Catheter size and type
Number of attempts
Site location and condition
Patient response
Complications if any
Ongoing Monitoring
Assess IV site every shift minimum
Monitor for signs of infiltration, phlebitis, or infection
Change dressing per facility protocol
Remove catheter at first sign of complications
Advanced Considerations for Experienced Practitioners
When to Consider Central Access
Multiple failed peripheral attempts
Need for long-term access
Vesicant medication administration
Poor peripheral vein quality
Quality Improvement Initiatives
Track success rates and identify improvement opportunities
Participate in continuing education
Mentor newer staff members
Stay current with evidence-based practices
Conclusion: Excellence Through Practice and Patience
Mastering IV insertion is a journey that continues throughout your nursing career. Each patient presents unique challenges and learning opportunities. The key is maintaining a systematic approach while remaining flexible enough to adapt your technique to individual situations.
Remember that even the most experienced nurses occasionally encounter difficult insertions. The mark of a professional is knowing when to ask for help, when to try a different approach, and when to consider alternative access methods. Patient safety and comfort should always be the primary consideration.
By combining solid foundational knowledge with these professional tips and maintaining a commitment to continuous improvement, you'll develop the confidence and skill that characterizes truly expert IV insertion technique. Your patients will benefit from your dedication to excellence, and you'll find greater satisfaction in this essential aspect of nursing practice.
Remember: Always follow your facility's policies and procedures, and when in doubt, consult with experienced colleagues or supervisors. Patient safety is always the highest priority.